
Inspired Icons
Inspired Icons
Can't see the whole design or maybe you can't see all the details in the embroidery? You can enlarge or reduce how much of your design area you see with the Zoom Tools. Use them to help you as you work with your embroidery projects.
Use the Zoom Bar  (in the 6D™ or 5D™ Embroidery System) to zoom in or out from the center of the currently selected picture or embroidery.
The Zoom Bar is on the right side of the Status Bar. Use the slider to zoom in or out of the picture or embroidery, or click on the
Zoom In
(in the 6D™ or 5D™ Embroidery System) to zoom in or out from the center of the currently selected picture or embroidery.
The Zoom Bar is on the right side of the Status Bar. Use the slider to zoom in or out of the picture or embroidery, or click on the
Zoom In  or
Zoom Out
or
Zoom Out  icons to increase or decrease magnification 10% at a time.
Use Zoom To Rectangle  to enlarge the view of an area of the embroidery.
Click the Zoom To Rectangle icon to the right of the status bar, and the mouse pointer changes to the zoom in pointer. Then either click a point on the embroidery you want to zoom in towards,
or click and drag a rectangle around the area you want to zoom in to and release the mouse button to zoom.
Use Zoom To Fit  to view the whole hoop area. Click the Zoom To Fit icon to the right of the status bar, and the view will zoom in or out to show the hoop area in the window.
Use the drop-down list in the Status Bar to set percentage levels to zoom in for the active embroidery, from 25% up to 800% (in the 6D™ Embroidery system).
Module Mystique
Module Mystique
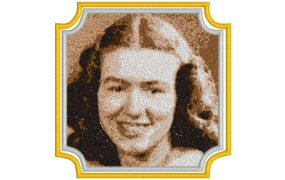
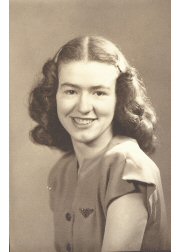
6D™ PhotoStitch and 5D™ PortraitStitch allow you to embroider color or monochrome embroideries from your own photos. Choose from 10 amazing stitch effects, including color, heritage sepia and color tile for an artistic 'pointillist' effect.
Use step-by-step wizards to create PhotoStitch embroideries easily, and edit the picture further if desired. Remove background areas and red-eye and use image effects and painting tools to improve your pictures. Frame the PhotoStitch automatically with your choice of hundreds of frames, corners or even machine motif stitches.
Here is just one example of the stitch effects available. Start with any photo, in this case a cherished family photo from years gone by, and turn it into a Sepia toned embroidery with just a few clicks.
Technique Tune-Up
Technique Tune-Up
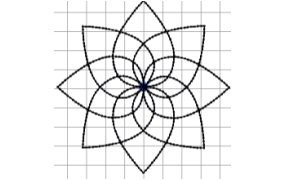
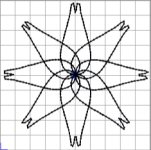
Do you want to create more quilting designs without digitizing them in Design Creator? Give the Morphing tools a try. In 6D™ or 5D™ Stitch Editor Plus, or 5D™ or 4D™ Stitch Editor give a new look to a design with morphing.
Start with the design pictured from the Samples Quilt folder. Then apply different morphing tools found on the Modify page, for example...
 Pinch - Push the stitches together in the center, while pulling the outer stitches away from each other.
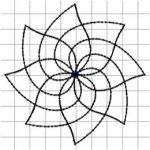 Ripple - Apply a wave pattern radiating from the center, like dropping a stone into a pond.
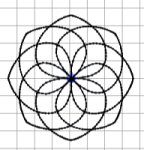 Spherize - Stretch the stitches around an imaginary sphere.
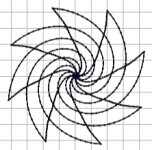 Twirl - Twist the stitches around the center, creating a swirling effect like a whirlpool.
Other Options available:
- Wave Horizontal - Move the stitches to follow a horizontal wave pattern.
- Wave Vertical - Move the stitches to follow a vertical wave pattern.
- Skew Horizontal - Slant the stitches horizontally to the left or right.
- Skew Vertical - Slant the stitches vertically up or down.
 QuiltDesign Creator
QuiltDesign Creator

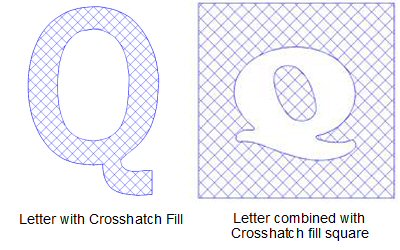
Lettering is one of several design tools found in the 5D™ QuiltDesign Creator program to help your creativity. Combine letters or words with different fill patterns or combine a letter with a filled square. This design uses a Crosshatch fill Q, combined with letters surrounded by QuiltStipple.
Below are a few other, even simpler possibilities for quilted lettering.
Fun Facts to Know and Tell
Did you know that the extension for cross stitch patterns is KRZ? It is actually not an embroidery design at the point that it is saved as a .krz file. KRZ is a file that you can return to and continue working on some more.
Best wishes from 6D™
P.S. Watch for the 6D™ newsletter next month as we look at fill points and also using Design Player to play through the stitches in the embroidery!

VANTAGE™ Embroidery Software Support is a membership program which provides education and support of the HUSQVARNA VIKING® & PFAFF 6D™ and 5D™ Embroidery Systems, QuiltDesign Creator and TruEmbroidery™ Software for Mac® computers. The VANTAGE™ program is currently available in the US, Canada, and Australia. Please visit your authorized HUSQVARNA VIKING® or PFAFF® dealer to learn more and sign up today.
This month with VANTAGE™ Embroidery Software Support features Mastering Your Embroidery Software: "Hooping It Up". In the Technology Corner, VANTAGE™ members will explore "All About Computer Memory".
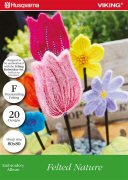
#279 - Felted Nature (920407096)
Release your imagination and have fun with these 20 freestanding felted embroideries. Embellish your purse or bag, or create amazing accessories and decorations. This new HUSQVARNA VIKING® collection (available next month) is designed to be embroidered with the Felting Embroidery Set (sold separately as an accessory). Hoop size from 80mmx80mm.
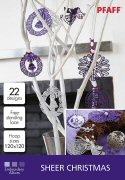
#478 - Sheer Christmas (821075096)
Let your imagination run wild and have fun with these 22 adorable Christmas embroideries in freestanding lace. Pick your favorite color and create your own Christmas decorations with this PFAFF® collection (available next month). You can find inspirational images both in the embroidery booklet and on the CD. Hoop size 120mmx120mm.