
Inspired Icons
Inspired Icons
Life View  is new to the 6D™ Embroidery System and can be found in most modules. Use Life View to view the embroidery in 3D with real-world perspective using the export options set in Configure.
You can see the effects of glow in the dark, solar reactive threads, twin needles, dual thread, and puffy foam.
is new to the 6D™ Embroidery System and can be found in most modules. Use Life View to view the embroidery in 3D with real-world perspective using the export options set in Configure.
You can see the effects of glow in the dark, solar reactive threads, twin needles, dual thread, and puffy foam.
In Life View, you can zoom in to see detail, move, and rotate the embroidery in a three-dimensional view. All parts of the embroidery that are within the hoop area are shown, whether or not they are selected. You will see the design with no grid, no stitches selected, or markers displayed, as well as with your choice of special thread effects.
Life View can be found next to the Design Player on the Home tab in 6D™ Embroidery. It is on the View Toolbar in the Design Window in 6D™ Design Creator and on the
View Toolbar in 6D™ Stitch Editor Plus, 6D™ Sketch, 6D™ Design Aligner, and 6D™ PhotoStitch.
Use the zoom slider to change the magnification of the embroidery. The box below the zoom bar displays the current magnification.
The position  slider lets you scroll over to another part of the Life View window.
The rotation
slider lets you scroll over to another part of the Life View window.
The rotation  slider tilts
the design to view the stitching in the embroidery in 3D. View the dimensions (Width and Height ),
the number of stitches
slider tilts
the design to view the stitching in the embroidery in 3D. View the dimensions (Width and Height ),
the number of stitches  and the number of colors
  in the embroidery.
Use Reset
in the embroidery.
Use Reset  to set Rotation, Position and Zoom back to the default settings.
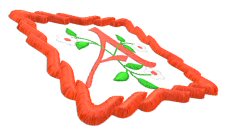
Use Effects  to change the appearance of an embroidery by showing the effect of using puffy foam, dual threads, or a twin needle for selected color blocks in the
Effects dialog. Pictured is a foam frame slightly rotated to see the height of the puffy foam.
to change the appearance of an embroidery by showing the effect of using puffy foam, dual threads, or a twin needle for selected color blocks in the
Effects dialog. Pictured is a foam frame slightly rotated to see the height of the puffy foam.
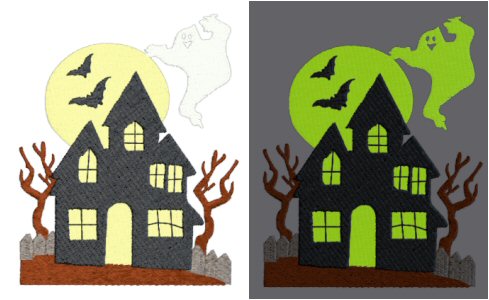
Want to see what that design with glow in the dark thread will look like when the lights go out? Click Glow in the Dark  to
view the effect. The preview darkens to simulate the lights dimming, and the glow in the dark threads are shown in their luminescent colors.
This sample Halloween design can be found in the 6DEmb\Stitch subfolder.
to
view the effect. The preview darkens to simulate the lights dimming, and the glow in the dark threads are shown in their luminescent colors.
This sample Halloween design can be found in the 6DEmb\Stitch subfolder.
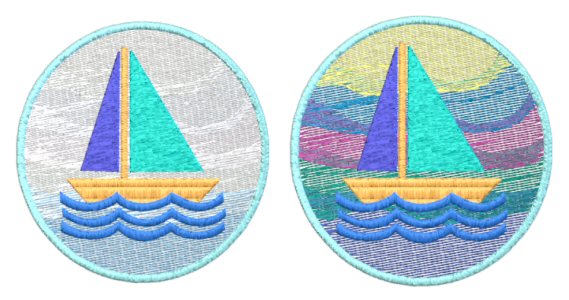
Want to see what the design with photochromic threads looks like in the sun? Click Solar Reactive  to view the effect.
The preview simulates the sun shining on the design, and the photochromic threads change shade to show the colors they become in sunlight.
The Sailboat design can also be found in 6DEmb\Stitch.
to view the effect.
The preview simulates the sun shining on the design, and the photochromic threads change shade to show the colors they become in sunlight.
The Sailboat design can also be found in 6DEmb\Stitch.
Use Play Demo  to animate the preview and show the embroidery at different angles automatically.
Play My Demo
to animate the preview and show the embroidery at different angles automatically.
Play My Demo  helps you to animate the preview using your own demo. Use the menu options to add the current position as a point in the demo, or reset to create a new demo.
The My Demo animation is used for Life View in all modules. It is stored in the AnimationPath.txt file in the \User\AppData\Local\VSMSoftware\6DEmbroidery\LifeView folder.
helps you to animate the preview using your own demo. Use the menu options to add the current position as a point in the demo, or reset to create a new demo.
The My Demo animation is used for Life View in all modules. It is stored in the AnimationPath.txt file in the \User\AppData\Local\VSMSoftware\6DEmbroidery\LifeView folder.
Module Mystique
Module Mystique
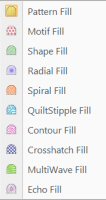
When you create your own designs in 6D™ Design Creator in the 6D™ PREMIER software, you have 10 Fill Area types to choose from, while in 5D Design Creator you have all but the Echo Fill. Motif Fill contains repeated small stitches placed using one of the Universal motifs, machine motif patterns, or one you have created.
In Motif fill areas  the small Motifs are used at any angle, at varying sizes, and alternate lines can use different motifs. In the Motif Fill dialog you can select motifs,
and set the motif angle, spacing, offset, stitch type and length when creating a motif fill area. Use Motif 1 to select the first motif and its size, and Motif 2 for a second optional motif.
the small Motifs are used at any angle, at varying sizes, and alternate lines can use different motifs. In the Motif Fill dialog you can select motifs,
and set the motif angle, spacing, offset, stitch type and length when creating a motif fill area. Use Motif 1 to select the first motif and its size, and Motif 2 for a second optional motif.
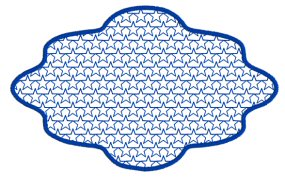
The design at the beginning of the section is a Motif Fill Area with default motif 5 from General Motifs 1, Horizontal Offset set to 50%, Vertical Gap set to -10%.
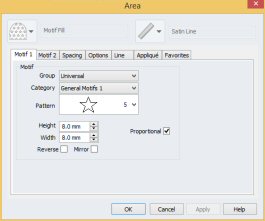 Select Motif Fill in the pop-up menu in the Fill Area section of the Create window, then click the Options button.
Set the number of motifs in the fill to 1 or 2. If 2 Motifs is selected, a second motif is placed on alternating lines with the first motif.
Select Motif Fill in the pop-up menu in the Fill Area section of the Create window, then click the Options button.
Set the number of motifs in the fill to 1 or 2. If 2 Motifs is selected, a second motif is placed on alternating lines with the first motif.
Decide whether to use 1 or 2 motifs, then click the Motif 1 or Motif 2 button to open the Motif Selection dialog. Change the angle of the motif fill pattern from 0 to 359 degrees. When you select Center Motifs 1 and 2, extra stitches are added to either side of the narrower of the two motifs, so it is the same width as the wider motif. The motifs can then be centered, and any horizontal offset between them is constant.
In the Spacing tab, select Horizontal Gap to add or remove space between motifs along a line, and Vertical Gap to add or remove space between lines of motifs. Horizontal and Vertical Gap can be set from -50% to +100%. Select Horizontal Offset to move motifs along a line, relative to their position in the previous line. Use Vertical Offset to adjust the position of a line of motifs, relative to the previous line of motifs. Horizontal and Vertical Offset can be set from -50% to 50%.
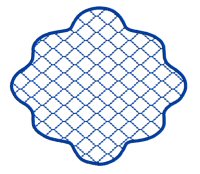
In the Options tab, select between Running and Triple stitch for stitching out the motif line. Set the maximum stitch Length from 1 to 6mm in steps of 0.1mm. This design is a Motif Fill Area with two motifs, 9 and 9 flipped vertically, from Hand Stitches 1.
Technique Tune-Up
Technique Tune-Up
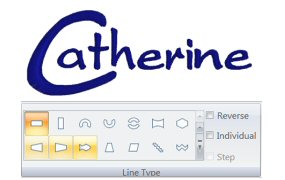
Individual lettering is new to 6D™ Embroidery. Use this feature to move and resize the letters individually. Individual lettering can be used with Horizontal, Diamond, Pennant Right, Pennant Left, Perspective, and Italic Line Types. On the Letter tab, simply place a checkmark in the Individual box before clicking Apply. Let's see another example.
The design on the upper right was created without Individual checked. The design on the lower left was created using Individual lettering, with the A and S sized larger. This can be accomplished in 5D™ Embroidery, with many more steps involved.

 QuiltDesign Creator
QuiltDesign Creator
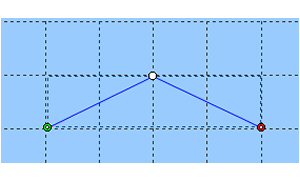
The Add/Delete Nodes tools are very handy editing tools when you want to change the shape of an object.
Use Add Nodes  to add a node to the currently selected line, and use
Delete Nodes
to add a node to the currently selected line, and use
Delete Nodes  to remove the currently selected node.
First, click the Add Nodes icon. Click the line that you want to edit and the nodes will be displayed. Click the place on the line where you want to add a node.
The line will be reshaped accordingly. The Add Nodes tool is active until another feature is selected.
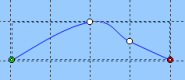
Use Delete Nodes to remove the currently selected node. If a middle node is deleted, the line will be redrawn to follow the path between the nodes that are left.
If an end node is deleted from an open line, the line will be shortened and the next node in the line will become the end node. If the joining node (end node) of a closed line is deleted,
the section of line until the next node will be removed, and the line will no longer be closed. Any fill will be removed.
First, click the Delete Nodes icon. Click the line that you want to edit and the nodes will be displayed. Click each individual node that you want to delete, and the line will be reshaped. The Delete Nodes tool is active until another feature is selected.
Fun Facts to Know and Tell
Did you know you can use the arrow keys on your keyboard to nudge a selected design left, right, up, or down?
Best wishes from 6D™
P.S. Watch for the 6D™ newsletter next month as we look at how to move through the designs on the screen in Embroidery Extra, the Border/Appliqué tools in Stitch Editor Plus, creating a motif in Design Creator, and the Knife tool in QuiltDesign Creator.

VANTAGE™ Embroidery Software Support is a membership program which provides education and support of the HUSQVARNA VIKING® & PFAFF 6D™ and 5D™ Embroidery Systems, QuiltDesign Creator, TruEmbroidery™ 3 and TruEmbroidery™ Software for Mac® computers. The VANTAGE™ program is currently available in the US, Canada, and Australia. Please visit your authorized HUSQVARNA VIKING® or PFAFF® dealer to learn more and sign up today.
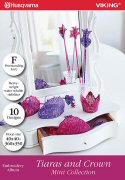
#295 Tiaras and Crown (920433096)
This mini collection will make all little princesses shine! Create crowns, tiaras, rings, necklaces, bracelets, magic wands and much more. When finished, embellish the jewelry with beautiful pearls and crystals to make them sparkle. All 10 designs are in freestanding lace. Enjoy! This HUSQVARNA VIKING® collection is available next month.
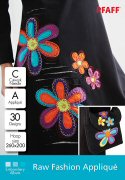
#485 Raw Fashion Appliqué (821099096)
This collection of 30 fun appliqué designs is perfect for adding a touch of whimsy to your garments or home décor projects. The raw edge appliqué and cutwork techniques are all done in the hoop - it doesn't get any easier than that. Once you start you can't stop! This PFAFF® collection is available next month.