
Inspired Icons
Inspired Icons
The Color Tone  page includes the Brightness, Contrast and Gamma sliders, and the Thread Range box.
Try varying the settings to enhance different designs - you can also combine more than one Color Tone tool. Use the Thread Range box to convert all the threads
in the embroidery to a new thread range, with or without adjusting the Color Tone options.
page includes the Brightness, Contrast and Gamma sliders, and the Thread Range box.
Try varying the settings to enhance different designs - you can also combine more than one Color Tone tool. Use the Thread Range box to convert all the threads
in the embroidery to a new thread range, with or without adjusting the Color Tone options.
- The Brightness effect makes the selected part or all of an embroidery lighter or darker than the original. Use it to lighten or darken embroideries. Adjust Brightness from -10 to +10 in steps of 0.1. The default setting is 0.
- The Contrast effect changes the amount of shading between areas for the embroidery. Use it to make specific areas stand out. Adjust Contrast up to +10 or -10 more or less than the original. Increasing the setting will increase the darkness of dark areas and the lightness of light areas. Adjust Contrast from -10 to +10 in steps of 0.1. The default setting is 0.
- Use Gamma to adjust the brightness and contrast together so that dark areas are made brighter, but bright areas are not overexposed. Adjust Gamma from 2 to 40 in steps of 1. The default setting is 10. Lower values will make the embroidery appear lighter.
- Use the Thread Range box to select the thread range used for the embroidery from the drop-down list. Choose from any of the manufacturer’s thread ranges or one of the MyThreads ranges you create using Thread Manager in 6D™ Configure.
One great feature in Color Tone is the ability to convert all the threads to a different thread range at once! The She Hug Bug found in the Butterflies & Bugs folder in the 6DEmb Samples was created using the Sulky thread brand. In the Color Tone Window, change all the threads to your favorite thread brand or your MyThreads at the same time, as pictured at the start of the section.
Module Mystique
Module Mystique

The Cross Stitcher Module can be found in 6D™ PREMIER software, as well as in the full 5D™ Embroidery System and 4D™ Embroidery System. The Multiply tool makes it easy to create symmetrical designs quickly from simple design elements, repeating them up to eight times.
Use Multiply to repeat stitch placement or edit actions automatically by reflecting across, down or rotating. All changes in the design, such as adding and removing stitches, pasting selections and inserting designs, are multiplied.
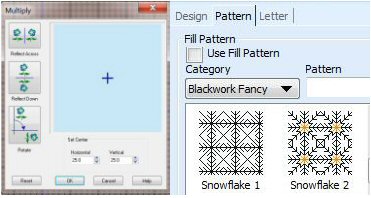
Choose any combination of Reflect Across, Reflect Down or Rotate to repeat actions. Click Use Multiply on the Design tab of the control panel to turn Multiply on and off. The blue Multiply reflection lines are shown on the work area when setting up Multiply and when it is switched on.
Place the six snowflakes shown in the pattern with a simple click then drag to create a box of 8x8 grids. The snowflake can be found on the Pattern tab under Blackwork Fancy.
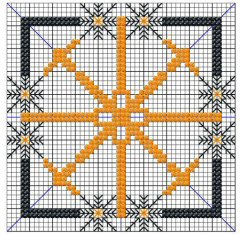
Then add the Crosses on the Design tab using the same colors as the snowflake design.
Technique Tune-Up
Technique Tune-Up

The QuickFont Wizard has been inside our embroidery software for quite some time now, to create fonts automatically for use with your 6D™ software, or your embroidery machine. The QuickFont Wizard is also available as a complimentary download for embroidery machine owners. Let’s see how it works.
In the 6D™ Embroidery System the Accessory QuickFont module from the 5D™ Embroidery System and 4D™ Embroidery System is integrated as part of the QuickFont Wizard. Use the QuickFont Wizard to create fonts automatically for use with your 6D™ Software, or your embroidery machine. Create a font automatically from a TrueType® or OpenType® font on your computer for use with your 6D™ software, or certain HUSQVARNA VIKING® or PFAFF® embroidery machines.
To create a font, on the Letter tab, click QuickFont Wizard  or click the shortcut for the QuickFont Wizard on your desktop.
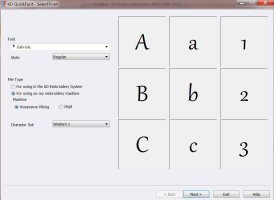
Select a Font from those found on your computer. Here we are using Gabriola, a font available in the Windows® Fonts folder. Select Regular, Bold, Italic or Bold Italic then click next. You can choose from Satin, Pattern Fill, Pattern Fill + Satin Border, Satin Border, Appliqué and Outline for the Stitch Type. Change the Stitch Options to include Density, underlay, and compensation. Set the size range.
When you click Done, the new Font will be saved in the MyFonts folder or wherever you specify. You can now use that new Font just as you would any of the built-in or system Fonts.
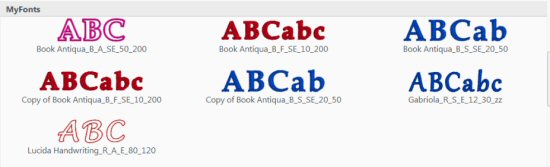
To create a font for use on your embroidery machine, simply select File Type "For using on my embroidery machine", select your brand of machine, then create as above. Save to a USB stick to use on your embroidery machine. The font shown in the “Fun with Fonts” text is Gabriola.
 QuiltDesign Creator
QuiltDesign Creator
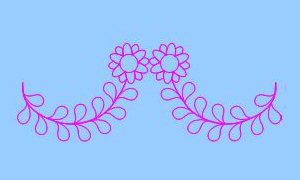
The Encore function  helps you to place repeated copies of a design in a line across the design area.
The number of copies is calculated automatically to fill the design area. The designs are placed in a line from left to right and centered in the design area.
helps you to place repeated copies of a design in a line across the design area.
The number of copies is calculated automatically to fill the design area. The designs are placed in a line from left to right and centered in the design area.

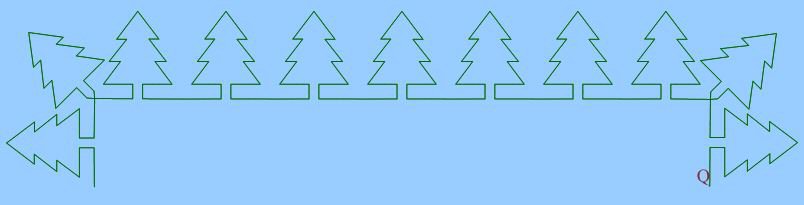
You have two Styles to choose from: Standard and Mirror. For Standard the copies of the design are simply duplicated one after another along the line, as shown below. For Mirror each alternate copy of the design is reflected.
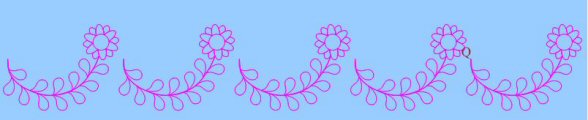
Use Gap to set the minimum spacing between repeated designs. It is often desirable to adjust the Gap until designs are touching or very close together, as this will reduce the number of jumps while stitching. Increase the Gap to move the designs further apart. Decrease the Gap to move the designs closer together. Use negative Gap to overlap designs by up to 50%. Set the Gap in steps of 0.4". The maximum Gap is one third of the width of the current Element or Work Area. The default Gap is 0.0". In this example, the gap is set to -1.42 inches (-36mm) to ensure that the flowers connect.


Use Margin to leave space between the repeated designs and the edge of the design area, perhaps for a corner design. The minimum Margin is zero. The maximum Margin is 39.370" (1m).
Fun Facts to Know and Tell
Did you know that there are over 150 special cross stitch and blackwork fill patterns included in the Cross Stitcher module?
Best wishes from 6D™
P.S. Watch for the 6D™ newsletter next month as we look at the Life View feature and Individual lettering in 6D™ Embroidery, Motif Fills in Design Creator, and the Add/Delete Node tools in QuiltDesign Creator.

VANTAGE™ Embroidery Software Support is a membership program which provides education and support of the HUSQVARNA VIKING® & PFAFF 6D™ and 5D™ Embroidery Systems, QuiltDesign Creator, TruEmbroidery™ 3 and TruEmbroidery™ Software for Mac® computers. The VANTAGE™ program is currently available in the US, Canada, and Australia. Please visit your authorized HUSQVARNA VIKING® or PFAFF® dealer to learn more and sign up today.
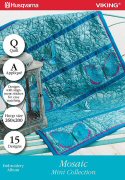
#288 Mosaic (920431096)
This is a fantastic mini collection with mosaic-looking designs and appliqués. It is a mix of 15 endless, single and All-Over-Embroidered designs. With these 15 designs you can create amazing quilts, accessories, home decorations and lots more! This new HUSQVARNA VIKING® mini collection is available next month.

#484 Combine and Create (821095096)
Enjoy 60 small designs that offer you unlimited combinations! Create endless embroideries, filled fabric, large designs, or use them just as they are. With the 6D™ Embroidery System or TruEmbroidery™ Software it’s so easy to create any design combination. This PFAFF® collection is available this month.